
In modern living, efficient use of lighting not only enhances the quality of life but also conserves energy. A timer switch for lights is a practical tool that allows you to control lighting automatically at specified times.
This not only brings convenience to daily life but also enhances home security when you’re away. This article will detail the types of time switches, how to set them up and use them, and the installation steps to help you better understand and utilize this technology. For more professional applications, consider using ATS switches to efficiently manage larger electrical loads.
What is a Timer Switch
A timer switch is an electrical device that allows you to control power to an appliance or light according to a preset schedule. These switches are designed to turn electrical equipment on or off at specific times, thereby saving energy, providing convenience, and allowing control of the equipment without human intervention. Usually used to automate indoor and outdoor lighting.
Types of Timer Switches for Lights
1. Mechanical Timer Switches
Mechanical timer switches are the most common type of timer switch, usually featuring a dial design where you set the time manually. They operate on a simple principle using internal mechanical gears, so they don’t require batteries or a power source.
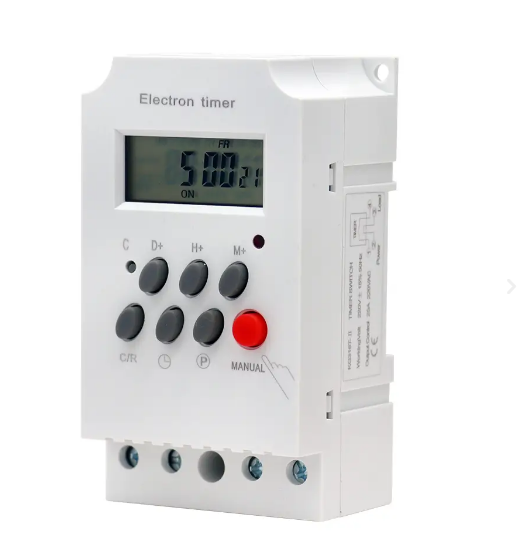
2. Digital Timer Switches
Digital timer switches use electronic controls and typically come with an LCD display, allowing for more precise time settings. These switches often offer multiple modes such as daily repetition, and separate settings for weekdays and weekends, making them ideal for users who need detailed time control.
3. Smart Timer Switches
Smart timer switches can be controlled via smartphone apps or voice assistants, and some even adjust settings automatically based on user habits. They often support remote control, real-time monitoring, and various smart scenes, making them increasingly popular in modern homes.
How to Set Up a Timer Switch
1. Setting Mechanical Timer Switches
Setting a mechanical timer switch is a relatively simple process and is suitable for situations where you need to control lights or home appliances on a scheduled basis. Here are the simplified steps for setting up a mechanical timer:
- Turn off the power: Make sure the appliance you want to connect is turned off.
- Install the timer: If it’s a socket-type timer, plug it directly into an electrical outlet. If it is a wall mount type, the existing switch will need to be replaced.
- Set the current time: Adjust the dial on the timer so that the indicator arrow is aligned with the current time.
- Set the switching time: Find the small paddle around the dial and push it in (on) or pull it out (off) as needed. For example, if you want to turn on the lights from 6 to 9 pm, push the paddle during this time period.
- Manual override selection: Most timers have a manual switch that allows the user to select “on”, “off” or “timer” mode at any time.
- Test and adjust: Turn on the power, check whether the timer operates correctly according to the preset time, and adjust the paddle position if necessary.
Follow these steps to ensure your mechanical timer is set correctly and operates efficiently
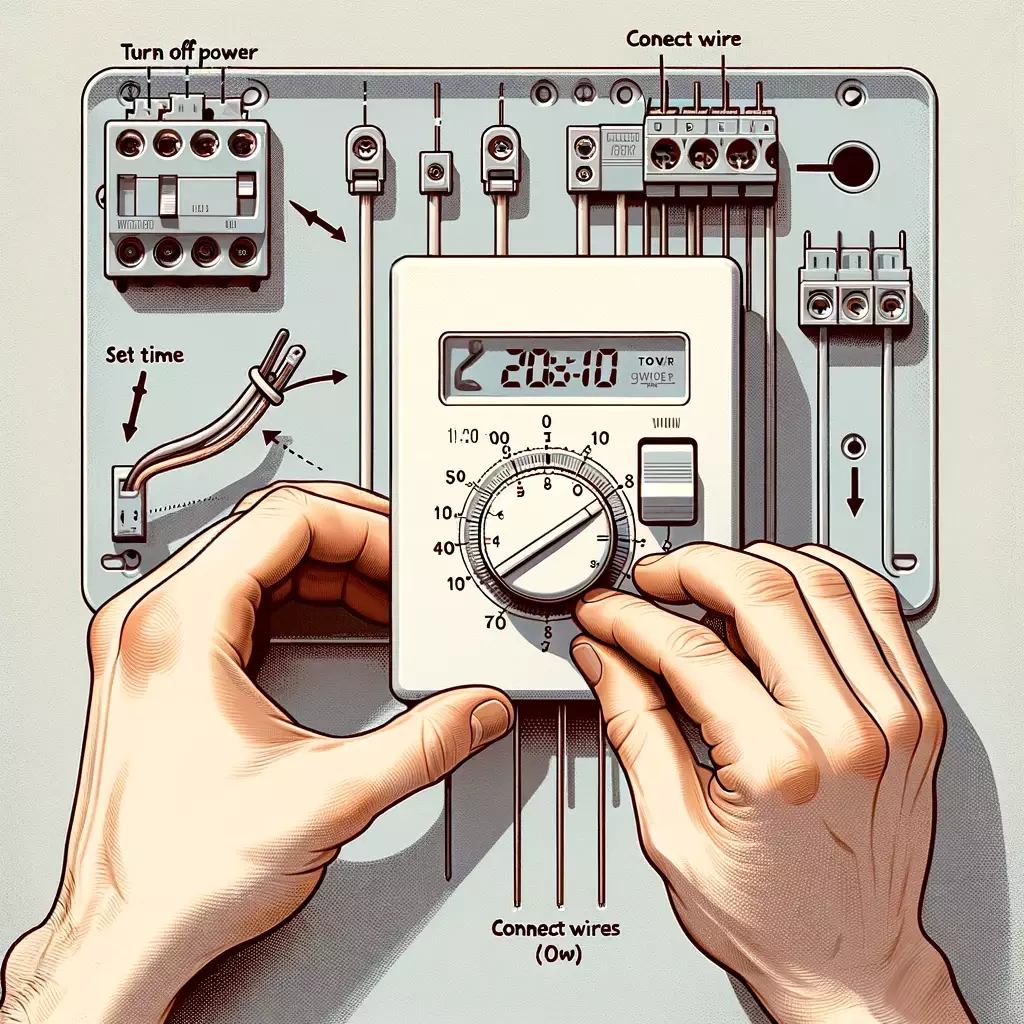
2. Setting Digital Timer Switches
Setting digital light timers can effectively manage light usage in your home or office, saving energy and increasing convenience. The following is a guide based on general digital light timer setup steps:
- First, press and hold the Clock button to reset any previously stored settings.
- Set the current time and date according to the instructions on the display.
- Press the “Mode” or similar button to switch to the timer setting mode and enter the timer setting mode.
- Second, use the date buttons to select the specific days you want the lights to turn on or off. Most timers allow you to select weekdays, weekends, or every day.
- Press the “hour” and “minute” buttons respectively to set the exact time you want the light to turn on or off.
- Finally, when the setup is complete, press the “Set” or “Done” button to save your configuration.
- After confirming that all settings are correct, exit setup mode.
- This process usually requires fine-tuning based on your timer model and the manufacturer’s specific instructions. Make sure to carefully read and follow the user manual that comes with your machine to ensure the setup is completed correctly.
3. Setting Smart Timer Switches
Setting up smart timer switches allows you to remotely control the lights and appliances in your home from your smartphone or other device, as well as automate operations based on your daily habits. Here are the steps to set up a smart timer switch:
- Choose a compatible smart timer: Make sure the timer supports your home’s voltage and power and is compatible with your smart home system (like Amazon Alexa, Google Home, etc.).
- Disconnect power for safety: Before proceeding with installation, make sure to disconnect the power.
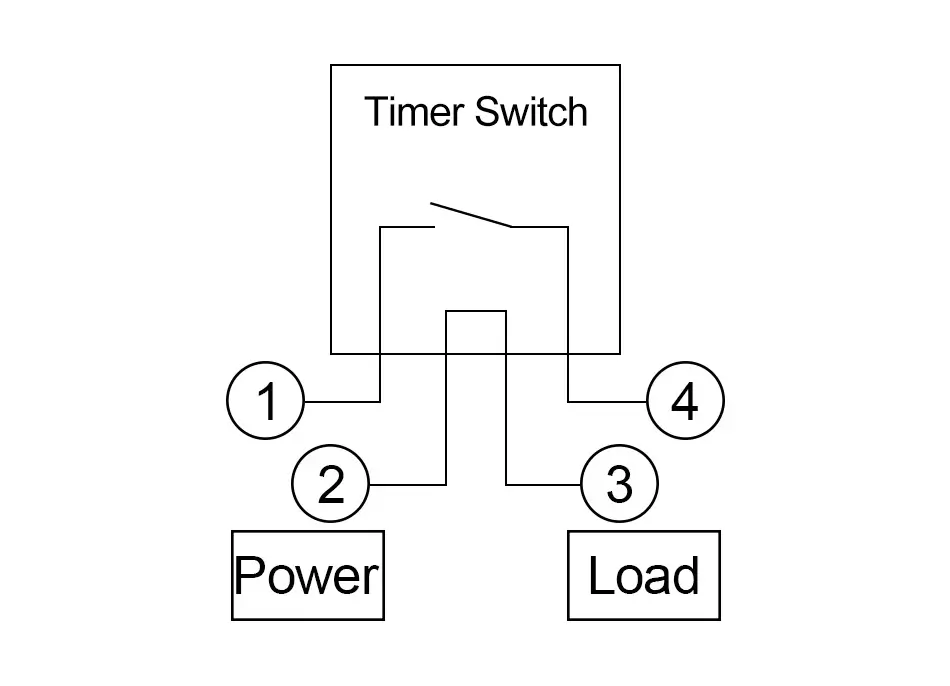
- Install timer: Remove the existing switch. Connect the wires according to the instructions, which usually include a ground wire (green or bare copper), a neutral wire (white or gray), and a hot wire (black or red). Turn on the power and complete the installation.
- Configure and connect to Wi-Fi: Use the manufacturer-provided app to connect the timer switch to your home Wi-Fi network. Set the timer switch time in the application, and you can set different rules for different times.
- Take advantage of additional features such as adjusting brightness (when dimming is supported) or setting up geofences to automatically turn lights on and off when you leave or return home.
- Test and update: Test the switch to confirm the settings are correct.
- Regularly check and update applications and device software.
Through these steps, you can effectively improve the intelligence level of your home, save energy, and increase the convenience and comfort of life.
To further improve your energy efficiency and renewable energy integration, consider exploring our solar transfer switches: the complete guide.
Benefits of Using Timer Switches
1. Energy Saving
Using timer switches can prevent unnecessary energy consumption. For example, automatically turning off lights during the day or when no one is at home can significantly reduce electricity bills.
2. Increased Security
By controlling the lights to turn on and off at specific times, especially at night or when you are away, timer switches can create the illusion that someone is home, thereby enhancing home security and deterring potential intruders.
3. Enhanced Convenience
Timer switches can automate lighting based on your daily routine, eliminating the need for manual operation. For example, setting lights to turn on in the morning and off at night can greatly simplify daily life.
Common Issues and Troubleshooting
1. Timer Switch Not Working
This might be due to loose wiring or internal faults in the timer switch. Check the wiring connections again and follow the manual for troubleshooting steps.
2. Timer Switch Inaccurate Time
For mechanical timer switches, it could be due to a loose dial or mechanical failure. Digital timer switches may need recalibration or battery replacement.
3. Timer Switch Noise Problems
Mechanical timer switches may produce slight noise during operation, which is normal. If the noise is excessive, it might indicate internal wear, and you may need to replace the switch.
How to Choose the Right-Timer Switch
1. Based on Your Needs
When choosing a timer switch, first identify your needs. If you only need to control the lights simply, a mechanical timer switch will suffice. Consider a digital or smart timer switch if you need a more precise time control or remote operation.
2. Considering Installation Location
The installation location is also an important factor. For example, in wet environments like bathrooms or kitchens, choose a timer switch with good waterproof performance. For outdoor use, select products with waterproof and dustproof features.
3. Features to Look For
Different timer switches come with various features. Some support multiple sets of timings, while others can be linked with other smart home devices. Pay attention to these features based on your specific needs when making a choice.
Conclusion
Light schedulers are simple yet effective energy-saving devices that can help you reduce electricity usage, increase convenience, and improve home security. By understanding the different types of timer switches and their functions, you can choose the product that best suits your needs and ensure it is installed and set up correctly.
We hope this article helps you understand and use timer switches effectively. If you want to buy a timer switch, don’t hesitate to contact our sales staff on the Moreday website. We are motivated to provide you with high-quality and favorable products.
