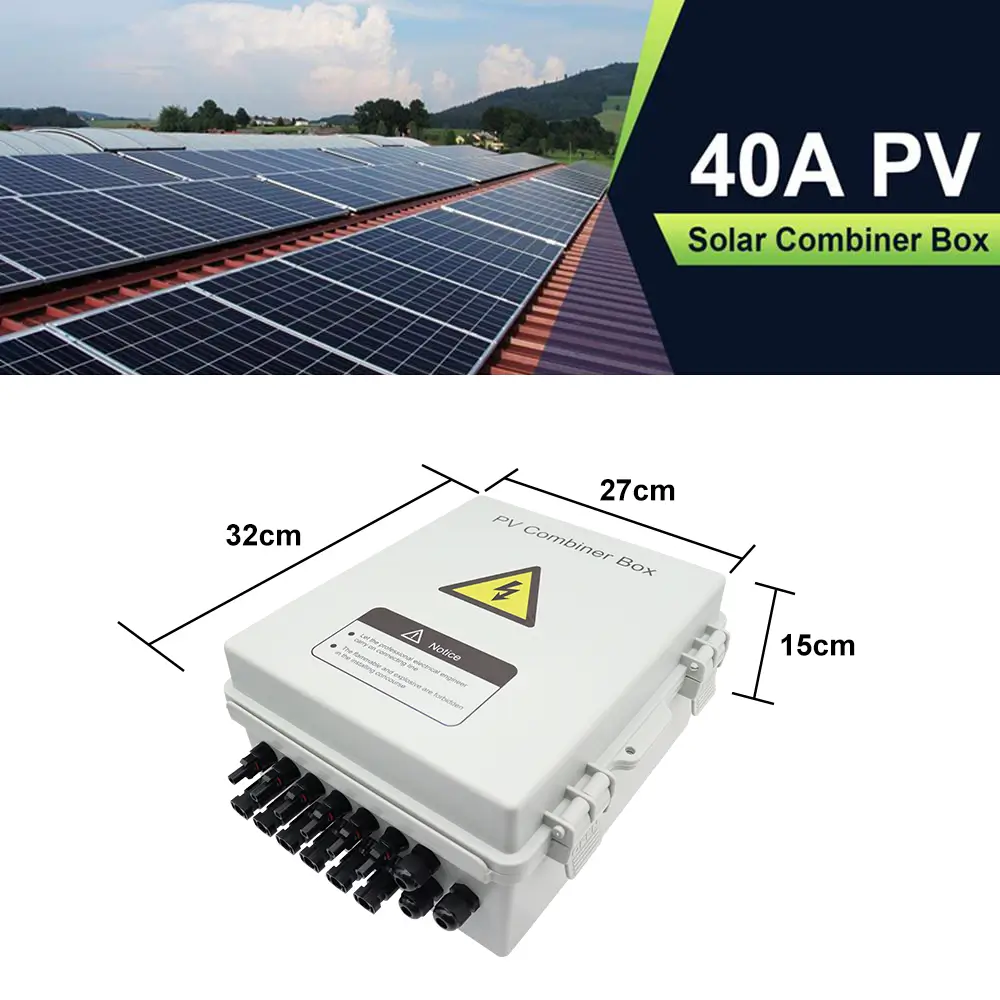
Are you installing a solar power system and wondering how to wire a pass-through box or combiner box? Properly connecting these components allows the power from your solar panels to be transferred to where it is needed (the inverter or charge controller).
In this post, we will detail everything you need to know about these boxes, from how they work to how to wire them. Whether you are installing a small solar installation or a large system, this guide will help you make sure you do it the right way. Let’s get into the details and learn how to wire a pass-through box or combo box with confidence.
Table of Contents
ToggleSolar Photovoltaic Basics
At its core, a solar photovoltaic (PV) system is a way to turn sunlight into electricity. The electricity generated by solar panels flows through a series of devices to be used or stored. Solar energy is a big deal because it’s helping us reduce our dependence on fossil fuels and moving us toward a cleaner, more sustainable energy future.
In a solar electric system, energy doesn’t just magically flow; it needs to be collected, transferred, and converted to something useful for our homes or offices. This is where components like combiner boxes and pass-through boxes come into the picture.
What is a Pass-Through Box?
A pass-through box is typically used in smaller solar PV systems. If you only have one or two strings of solar panels (a “string” is a series of panels wired together), then you don’t need anything too fancy.
The pass-through box provides a convenient and safe spot to wire the wires coming from your solar array.
What is a Combiner Box?

In larger systems, where you have three or more strings running in parallel, you’d likely need a combiner box. The combiner box brings together all the individual wires from each string and combines them into a single larger wire.
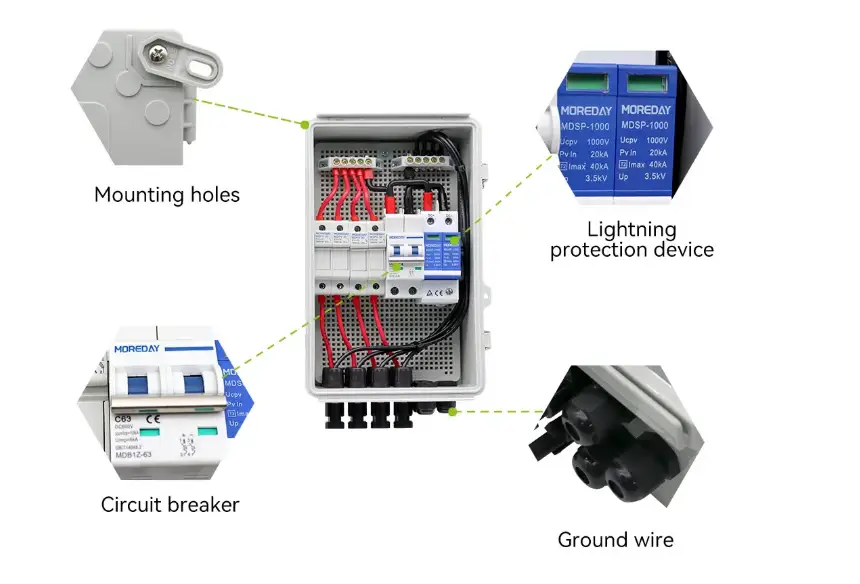
This makes it easier and less chaotic when you’re running wires down to the inverter or charge controller. A combiner box also requires fuses or breakers to protect your system from overcurrent.
So, which one should you use? If you’ve got a small system, a pass-through box will probably get the job done. Larger systems demand a combiner box for safety reasons and to streamline your setup. Let’s break it down further.
Role of Overcurrent Protection Devices (Fuses and Breakers)
In larger systems with three or more strings, combining the current from those strings can overload the wires if the current isn’t controlled. This is where fuses or breakers come in. They protect your system from the risk of too much current flowing at once, which could cause the wire insulation to melt or, in extreme cases, start a fire.
You’ll install the fuses directly inside the combiner box, but before picking one, be sure to check the specs—particularly the temperature ratings of the overcurrent protection devices. Why? If your system overheats, those fuses will blow or the breakers will trip, causing frustrating power interruptions.
Wiring Your Solar PV System: Pass-Through Box vs. Combiner Box

1. Wiring a Pass-Through Box
If you’re only passing through one or two strings from your solar array, here’s what you do:
- Mount the pass-through box securely: Your box should be rated for outdoor conditions—NEMA 3 or NEMA 4 if it’s outside.
- Run your solar PV wire into the box: Use appropriately sized holes and strain relief connectors to protect the wires where they enter.
- Make your wire wires: You’ll need to connect the positive and negative wires coming in from the array. These will either be connected using wire nuts or terminal blocks.
- Transition to less expensive wire: Once inside the pass-through box, you’ll often transition from the higher-cost PV wire to something less expensive like THWN-2 wire. THWN-2 can handle both moisture and heat, making it a reliable option for wiring that runs to the inverter.
2. Wiring a Combiner Box
For larger systems, the process is similar, but a few extra steps come into play. Here’s a quick rundown:
- Mount the box: Choose a sturdy, weather-tight location for your combiner box. It should give you ample space for the number of strings (and corresponding wires) you’re combining.
- Run your PV wires into the box: Just like with a pass-through box, use strain relief to ensure a snug and waterproof fit for each wire.
- Install fuses: You’ll need to fuse each positive line from the array. Cut and strip the wires, then wire one side to the fuse and the other side to the positive terminal inside the box.
- Combine the wires: After fusing each positive wire, you’re left to combine both your positive and negative wires into one larger conductor.
- Transition to larger wire: Now that you’ve combined the smaller wires, it’s time to change to a single, larger wire—usually 8 AWG THWN-2 or something similar that can handle the higher current.
Importance of Electrical Enclosures and Wire Types
It is important to note that wiring a solar system requires attention to detail and safety standards. The National Electrical Code (NEC) has specific regulations for enclosures and connections. According to the NEC standards:
Use a weatherproof enclosure for outdoor wiring: If the distribution box is to be used outdoors, it should be rated NEMA 3 or 4, ensuring it is sealed to keep out moisture and dust.
Avoid overcrowding: Cramming too many wires into a small box can generate heat, causing insulation to wear out and even short circuits.
Ensure proper strain relief: Always use strain relief connectors to protect wires from damage as they enter the enclosure. This step is critical to maintaining safety and the longevity of the system.
Solar System Wiring Precautions
1. Color Code Compliance
Positive wires use red and negative wires use black. This is a basic wiring specification that can help you avoid confusion during future system maintenance and troubleshooting. Strictly following this color code is an important basis for ensuring system safety and efficiency.
2. Disconnect Power to Ensure Safety
Before starting work, be sure to disconnect all solar modules to avoid the risk of electric shock. Even if solar panels do not seem to have much power, they can generate enough current to cause strong electric shocks, so you need to be vigilant when operating.
3. Choose the Right Wire
Photovoltaic wire (PV Wire): Suitable for installation near solar arrays, durable, and can cope with harsh environments such as high temperature, ultraviolet rays, and humidity.
THWN-2 wire: Applicable to the part where energy flows from the solar array to the inverter, with heat resistance, can be used reliably in indoor and outdoor environments.
Using wires designed specifically for solar energy can effectively reduce system failures and safety hazards.
4. Standard Installation of Grounding System
Connect the bare copper grounding wire to all physical equipment in the solar system, including solar arrays, feed-through boxes, and combiner boxes. This provides a safe release path for the current, preventing equipment damage or personal injury caused by a short circuit.
This structured content is suitable for inclusion as a note in an installation guide or technical manual. You can also add specific operating tips or additional safety advice as needed to improve readability and practicality.
Final Thoughts
Wiring a solar pass-through box or combiner box may seem daunting at first, but once you break it down into individual steps, it’s doable. Whether you’re planning a small system with just a few wires, or a larger system that requires more complex protection and wiring, attention to detail is key.
Double-check all wire gauges and fuse sizes for compliance with the NEC, and always make sure the box you’re using is large enough to safely accommodate all of the wires. Don’t forget—If you are in doubt, it is always best to consult with our professionals at MOREDAYDC to ensure everything complies.
Related reading: How to size solar combiner box?


